Posts

Showing posts from December, 2014

Install Windows from Booting USB Pen, Thumb or Flash Drive

Image
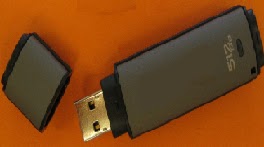
Normally, Windows is installed using optical media like DVDs and CDs but there are times when it is not possible to boot into the windows setup using disks probably because your DVD drive is not working or, if you are using one of those ultra-portable laptops, it is not there at all. To overcome this problem, one can either use an external DVD drive and install Windows normally or create a bootable pen drive to install Windows whenever needed. In this tutorial, we will discuss about the latter and learn how can we create a bootable USB drive for installing Windows XP, Windows Vista, Windows 7, Windows 8 or Windows 8.1 . As installing Windows from a flash drive is much faster than from a CD/ DVD, such an installation will also save time. This article assumes that your computer has a mother board which supports booting from USB drives. Most modern laptops and desktops support it. If you have bought your computer in the last 5 years, you do not need to worry about this. Inst

Enable Task Manager disabled by Administrator or Virus in Windows

Image
Windows Task Manager is used to view details about processes running on your computer. Since it can be used to terminate programs that are misbehaving or are viruses disguised in the form of harmless programs, most spyware and viruses disable it to prevent themselves from being closed through it. Some administrators also disable Task Manager to prevent users from closing important security programs like antiviruses and anti-malwares. In such situations, running the Task Manager will give the " Task Manager has been disabled by Administrator " error. However, there are some techniques you can use to re-enable task manager and close those harmful programs manually. This article contains few such simple techniques you can use to regain access to Task Managing privileges. Enable Task Manager from Registry in Windows 8, 7, XP or Vista Registry Editor is an inbuilt Windows tool that is used to modify registry keys which tell Windows how it should work. A simple registry

How to Start Windows in Safe Mode Easily

Image
Safe Mode is a special diagnostic mode in which Windows runs with the minimum amount of features. As the features are limited, Windows does not load unnecessary startup items and runs only those files and drivers that are necessary for the basic functioning of the operating system. This allows users to remove recently installed programs that might be preventing Windows from starting correctly. As Windows does not start  unnecessary programs while in Safe Mode, Safe Mode can also be used to remove viruses and malware that cannot be removed normally without risking the infection getting worse. There are different ways in which you can get into the Safe Mode in Windows. They depend on the version of Windows you are using. Windows 7, Windows Vista, Windows XP and Previous versions If you are using these versions of Windows, you can try the following methods. The Trusted F8 key method 1) Restart your computer if it is on. 2) Right before the system starts to boot, start

How to Secure a Wireless Wi-Fi Network

Image
With the world going wireless in every sphere of technology, the question of security has often been raised. The same is true for wireless internet networks or Wi-Fi networks with hackers and Wi-Fi intruders always looking for ways to gain access to unsecured networks. There are several reasons why you might want to protect your Wi-Fi network. Prominent among them include better privacy, reduced internet bills and faster internet speeds.This post contains few simple techniques you can use to make sure that your wireless network is as secure as it possible can be. Protect your Wireless Internet Network 1)  Encrypt your Wi-Fi Network : When you use a Wi-Fi network for accessing the internet, every piece of data you send and receive over the air can be easily snooped by anyone with the right set of tools. Packet sniffers can be used by even the most novice of users to sniff your data. This means that a hacker can not only see which websites are you accessing but also get the login

Watch ASCII Star Wars in Windows XP, Vista, 7 and 8

Image
Every one of us has watched Star Wars on television, computer or in a theater. It is the same movie with aliens fighting each other for galaxies and such stuff. There is nothing new in it. But wait, have you watched an ASCII (American Standard Code for Information Interchange) version of Star Wars and that too in Windows using telnet ? A network protocol known only to computer wizards. Well if you have not, then you must do it now! There is a complete copy of Star Wars done entirely in ASCII characters that you can watch in the Windows operating system (or any OS that supports telnet). The only thing required to watch it is an internet connection; speed does not matter. To watch it on Windows XP,   Mac OS X and Linux Go to Start, Run. (Only for Windows users) Now type "telnet towel.blinkenlights.nl" without the quotes and press Enter. Users of Mac OS X and Linux can directly execute this code in the terminal window. On Windows 8, Windows 8.1, Windows 7 and Wi

Lock a Folder With Password Using Free Folder Protector

Image
All of us have some files and folders that we consider private. They can be anything from our business documents to pictures of friends and family. These are files that we don't want other people using our computer to know about. As Windows offers no way to protect our private information, most of us get in awkward situations when these files are discovered by unwanted people. Surely, you can store this information in a hidden folder. The only problem is that anyone can easily search the contents of a hidden folder using Windows Search itself. The only viable solution is storing this content in a password protected folder so that only those people knowing the password of the folder can access it. There are many folder locking programs available online but the problem is that most of the good ones are paid. Even if you do manage to get a good free one, you will be looked at suspiciously when people see a folder locker in the list of your installed programs. I

Change your Processor's Name

Image
Problem: To, make the name change permanent, it was required to update the Processor Name String registry key every time Windows starts. Solution: It is very easy to change your processor name permanently by creating a registry key and placing a shortcut to it in the Windows start up folder. To do so, just follow the steps given below:- Steps :- 1.  Open Notepad. 2.  Copy and paste the exact code given below:- Windows Registry Editor Version 5.00 [HKEY_LOCAL_MACHINE\HARDWARE\DESCRIPTION\System\CentralProcessor \0 ] "ProcessorNameString"=" My Processor name 50000MHz " To change the processor name, edit the part of the code given in blue. Also understand that \0 in the above code should only be present if Windows store your processor name at that location. Open the Registry Editor and navigate to the above mentioned keys to check whether or not to include the \0. 3.  Click on File Menu, click on Save As and select "All Types" in

Cool Keyboard Tricks (Windows) : Make a Disco

Image
Keyboards usually have small LEDs which indicate whether different types of locks are activated or not. Here is a trick to use the lights of your keyboard in a more creative manner in Windows. This trick uses a simple Visual Basic Script which when activated makes your Scroll lock, Caps lock and Num lock LEDs flash in a cool rhythmic way which gives the perception of a live disco on your keyboard. To make your own live disco, follow the steps given below:- 1. Open Notepad. 2. Copy paste the exact code given below:- Set wshShell =wscript.CreateObject("WScript.Shell") do wscript.sleep 100 wshshell.sendkeys "{CAPSLOCK}" wshshell.sendkeys "{NUMLOCK}" wshshell.sendkeys "{SCROLLLOCK}" loop 3. Save the file as Disco.vbs or "*.vbs". Double click on the Saved file to see the LED lights on your keyboard go crazy and make your own cool disco. This trick has been tested on Windows XP , Windows Vista, Windows 7 an

Recover Deleted files in Windows with Free Tools

Image
Have you ever deleted a file that you did not wish to and wanted to recover it but did not find it in the recycle bin? You probably deleted it permanently with Shift+Delete or emptied the Recycle Bin. Now what? Don't worry, you may still have a chance to get it back. This article lists some free software that can recover deleted files from your hard drive or any other storage device instantly. But how do the software mentioned below undelete deleted files? When files are deleted, Windows does not delete them from your hard disk. It marks the storage space as empty for new data to be written and deletes the index entry that tells the location of those files. Unless, new files are written on that space, the deleted files are still recoverable. That's what allows these software to recover deleted files. There are many free software that allow users to do this. Some of them are given below:- 1) Pandora Recovery Pandora Recovery is a free software that

Use Keyboard as Mouse

Image
If your mouse is not working and you don't wish to wait till you get a new mouse, you would definitely like to know how you can use your keyboard as mouse. It is easy to use your mouse as keyboard in Windows using the On Screen Keyboard utility, but it is also possible to do the reverse. All you need to do is: Windows XP Users:- Go to Control Panel . Then click on Switch to Classic View . Then Click on Accessibility Options . Then Click on the Mouse Tab . Select Use MouseKeys. Click on OK . Then activate NumberLock (by pressing the NumLk key). You should hear a beep sound. Now you can control the mouse pointer using the arrow keys on the numeric keypad. Windows 8 , Windows 7 and Vista Users: Open Ease of Access Center by clicking the Start button , clicking Control Panel, clicking Ease of Access, and then clicking Ease of Access Center. Click Make the mouse easier to use. Under Control the mouse with the keyboard, select the Turn

Disable USB ports on Windows PC via Registry

Image
With this trick, you can disable access to your USB(Universal Serial Bus) ports on your Windows based PC to prevent people from taking out data without permission or spreading viruses through the use of USB (pen and flash) drives. To use this trick to disable USB ports , follow the steps given below:- Click on Start . Click on Run . If you cannot find RUN, type it in the search box. Type "regedit" without quotes. This will launch the Registry Editor. Navigate to  HKEY_LOCAL_MACHINE\SYSTEM\CurrentControlSet\Services\usbstor. In the work area, double click on Start . In the Value Data box, enter 4. Click on OK . Close Registry Editor and refresh your desktop. To re-enable access to your USB ports, enter 3 in the Value Data box in Step 6 . Try it yourself to make your PC invulnerable from data theft and malware which spread through USB ports. This works on Windows XP, Windows Vista, Windows 7 and Windows 8. Note : This trick also disables acce

How to Increase the Virtual Memory of Your Computer

The kind of program you can use and the speed of your computer rely on its random access memory or RAM, which may sometimes be referred to as the “memory.” If you are planning to use high-edge programs or multi-task using memory-consuming applications, then you should consider increasing your computer's RAM. However, doing this might require you to buy another physical RAM. Fortunately, you can now use the sleeping space of your hard disk to add speed to your computer through setting the virtual memory.  Materials Needed: - Computer - control panel Step 1 Determine your computer’s RAM and hard disk space. Decide also on how much virtual memory you will create. The best way to do this is to compute the minimum required memory by the programs you will be using. Step 2 Click the 'Start' button and from the pop-up menu, choose 'Settings'. Clicking that will display a drop down menu where the Control Panel is. Click that and the Control Panel window wil

Dual Booting Windows 8.1 and Ubuntu 14.04

Image
It appears that Windows remains ahead in this operating systems arm race: dual booting with Linux has become even more difficult. Here are some updated instructions from thelast time I dual booted, in an "idealized order" I have inferred through my various failures*. Shrink the size of your Windows partition and create a new simple partition for your Linux installation to go in. ( More . ) Get an Ubuntu image   onto a DVD  or a USB drive. Turn off Fast Boot in Windows. ( More . ) If you don't do this, your system is going to boot straight into Windows every time. Disable Secure Boot in your BIOS. ( More . ) Enable UEFI and disable Legacy Boot in your BIOS. ( More .) I'm not sure why this has to happen, but my Ubuntu Boot-Repair kept failing until I did this. Boot from your image. (If you haven't turned off Fast Boot, you might discover that there are   new ways of doing this in Windows 8.1 . But you should have turned off Fast Boot.) Follow the i

Universal USB Installer – Easy as 1 2 3

Image
Universal USB Installer  aka UUI is a  Live Linux USB Creator  that allows you to choose from a selection of Linux Distributions to put on your USB Flash Drive. The Universal USB Installer is easy to use. Simply choose a Live Linux Distribution, the ISO file, your Flash Drive and, Click Install. Upon completion, you should have a ready to run bootable USB Flash Drive with your select operating system installed. Other features include;  Persistence  (if available) – note that casper persistence will only work with fat16 or fat32 formatted drives. Universal USB Installer (UUI) Screenshots Universal-USB-Installer-1.9.5.8.exe – November 19, 2014 – Changes Update to support Linux Lite Universal-USB-Installer-1.9.5.8.exe Source Code MD5: A53E9522CABCA72A4FC5199674B0D5ED

How to Build Your Own Suse.com Operating System

Image
You're just a normal person. But you want to impress your friends. Seem High-Tech. So you thought up a little plan. Make your own Operating Software! But you aren't a computer guru. Making an Operating System is as hard as you think it is. But there is a little solution to your problem...Suse Studio. Suse Studio is a website to help you make your own OS(Operating System) distribution P.S"Based on opensuse". Steps 1 Open your web browser and type in "susestudio. com" 2 In the top right corner of the page, you'll see a Create account/Sign in link. Click one of the following that you have an account in: Google, Yahoo, Twitter, Facebook, OpenID, or Novell. 3 A "Sign In" screen will appear.  Type in your password and click 'Sign In'. 4 This message should appear:  Click "Agree" to sign in to susestudio.com using your ID, and allow sharing of info. Click the "Agree" button. 5 Fill

Website Security Certificate Problem

Problem - There is a problem with this website's security certificate.  The security certificate presented by this website has expired or is not yet valid.  Certificate Error: Navigation Blocked Likely Solution: If numerous, disparate sites are displaying this error, the Date Time on the computer is likely incorrect.  In Windows, click the System Tray's Time (lower-right corner) and confirm the date. If the date was way off, the hardware's BIOS date and time is wrong.  Correcting the time above will reset it, but if it continues to fail, the motherboard's BIOS battery may be dying and may need to be replaced.  This is likely an issue only on older computers. Date Time is Correct - Problem only with one site: If the Certificate Error only occurs on a single site, consider the following: 1.  In Internet Explorer (or other browsers), click "Continue to this website (not recommended)" 2.  Click the Certificate Error to open the information